Last updated: November 19, 2026
Key Takeaways
- Your budget has three parts: cleaning, patching, and specialist help.
- Start with every room, price the hard tasks, then add a small cushion for the final walkthrough.
- Cheap, visible fixes are usually the first ones to tackle because they can affect deductions.
- Hire a professional cleaner when the unit is large, the lease is strict, or your schedule makes a deep clean unrealistic.
Moving out as a single parent means the move-out cleaning and minor repairs budget has to protect your deposit without draining the money you need for the next place.
Budget for the mess you can see, the damage you can fix, and the tasks you can’t finish alone.
This guide shows how to budget for cleaning and repairs after moving out, what to price first, what to skip, and how to plan for the landlord inspection and final walkthrough.
Before the move-out checklist starts, keep one thing in view: the goal is not perfection. It is to return the place in the condition your lease expects, with enough cash left over to keep the rest of the move stable.
Move-out cleaning and minor repairs: what you are actually paying for
You are paying for three buckets: cleaning, patching, and specialist help. Most families need a mix of all three, and the wrong budget leaves out the small jobs that trigger deposit deductions, like greasy ovens or nail holes in a wall.
Picture this: you’re standing in an empty living room after the boxes are gone, and the place looks “almost clean” until you notice baseboards, blinds, and a carpet stain near the sofa. That is the budget trap. Small jobs stack up fast, and the landlord inspection tends to notice the same things every time.
A practical budget starts with the work you can name:
- full move-out cleaning
- appliance cleaning
- patching holes
- carpet cleaning
- a professional cleaner if time is short
- a small buffer for the final walkthrough
If you need a starting point, use a simple split: cleaning, repairs, and backup cash. The backup cash matters because a landlord may point out one more issue after the first pass, and that extra round can mean a 2-hour errand, a store run, or another service call.
Here’s the catch: not every problem deserves paid labor. A wiped fridge shelf is cheap. A broken blind or damaged carpet edge is not. One useful way to budget for cleaning and repairs after moving out is to separate the two before you spend.
How do I build a move-out cleaning budget step by step?
You build it by listing every room, pricing the hard tasks first, and then adding a cushion for the final walkthrough. That turns a vague worry into a real number you can work with.
Picture this: you’re at the kitchen table with a notebook, a phone, and half an hour before bedtime. The place is noisy, the kids need something, and you still have to guess what the move-out clean will cost. This is where a room-by-room estimate saves you.
-
Walk each room and write down visible tasks.
Note grease, soap scum, scuffed walls, holes, carpet stains, and appliances that need detail cleaning. Keep it concrete: “oven,” “two nail holes,” “bathroom grout,” not “messy.” -
Sort the list into do-it-yourself and paid jobs.
Wiping shelves, scrubbing sinks, and washing cabinet fronts are usually DIY. A carpet cleaner, wall patching beyond a few holes, and deep appliance cleaning often need more time or tools than you have. -
Price the tools you need before calling a service.
Add up a patching kit, wall filler, spackle knife, cleaning spray, microfiber cloths, gloves, and any rental or supply you do not already own. Small supplies can be cheap alone and annoying together. -
Get one professional quote for the jobs you cannot finish.
A professional cleaner is worth pricing when you have long hours, little childcare backup, or a unit that needs more than a quick tidy. Ask for a move-out cleaning quote, not a regular house-cleaning price. -
Set aside a repair cushion.
Leave room for one surprise item from the landlord inspection. A loose blind slat, a sticky oven door, or one more wall patch can turn a thin budget into a stress problem.
A good budget sheet has line items, not guesses. If you do not know the exact cost yet, mark it as “estimate” and add a small buffer. That way, the final walkthrough does not blow up the whole plan.
Which repairs are worth doing before I move out?
The repairs worth doing are the ones that are cheap, visible, and likely to show up as deductions. Small wall holes, marked surfaces, and obvious dirt are the first things to handle because they are easy to notice and easy to overcharge for.
Picture this: you’re looking at a wall with a few picture-hanger holes and a scuffed corner near the hallway. Those are the kinds of issues that feel minor to you and look unfinished to a landlord. Patchable damage is often a strong target because the fix is usually faster than fighting over the deposit.
Focus on the jobs that change how the place looks in 30 seconds:
- nail holes and small dents
- loose caulk around sinks or tubs
- sticky oven racks or burner pans
- dirt on baseboards and switch plates
- carpet spots that can still be lifted
- cabinet grease near the stove
Skip expensive repairs that are really landlord territory unless the lease says otherwise or you caused something major. A worn carpet pad, old paint fade, or aging appliances are not the same as fresh damage. That difference matters.
The truth is, the plain repairs are often the ones that matter most. A patching kit and a scrub session can do more for your deposit return than a big spending spree. Don’t pay for a new look if the unit only needs a clean finish.
Move-out repairs: what to fix first
- Wall holes: Patch and touch up if the damage is from normal hanging use and the wall paint is still workable.
- Kitchen grease: Clean first; repaint only if the surface still looks stained after scrubbing.
- Bathroom grime: Remove soap film, mold spots on caulk, and mineral buildup.
- Carpet marks: Vacuum, spot-clean, then decide if a carpet cleaner is worth it.
- Broken items: Replace cheap, easy parts like a shower curtain rod or a missing cabinet knob if they were part of the original setup.
If the repair needs electrical, plumbing, or structural work, that is not a budgeting game. Leave it to the landlord or a qualified tradesperson and keep the money separate.
Should I hire a professional cleaner or do it myself?
You should hire a professional cleaner when the unit is large, the lease is strict, or your schedule makes a deep clean unrealistic. If you have only a few hours after work and child care is tight, paying for help can be the cheaper choice in the long run.
Picture this: you’ve already packed for three nights in a row, the kids are tired, and the fridge still needs cleaning before pickup day. This is where DIY starts to cost you time, sleep, and deposit money. A pro cleaner is a time buy, not a luxury, when the move-out date is close.
Use this rule of thumb:
- DIY if the home is small, the mess is light, and you have a full day free
- hire help if there’s heavy grime, built-up bathroom scale, or a long list of rooms
- split the work if you can do the wipe-downs and leave the deep clean to someone else
A pro cleaner is not magic. They may still leave out details if you do not spell them out, and they may not handle repairs like patching holes unless that service is part of the quote. Ask what is included, room by room, before you agree.
However, the best part of a clear handoff is that it can save your energy for the final walkthrough. That matters when you are managing school bags, keys, and a truck on the same day. If the cleaner is not handling appliances or baseboards, budget time for those yourself.
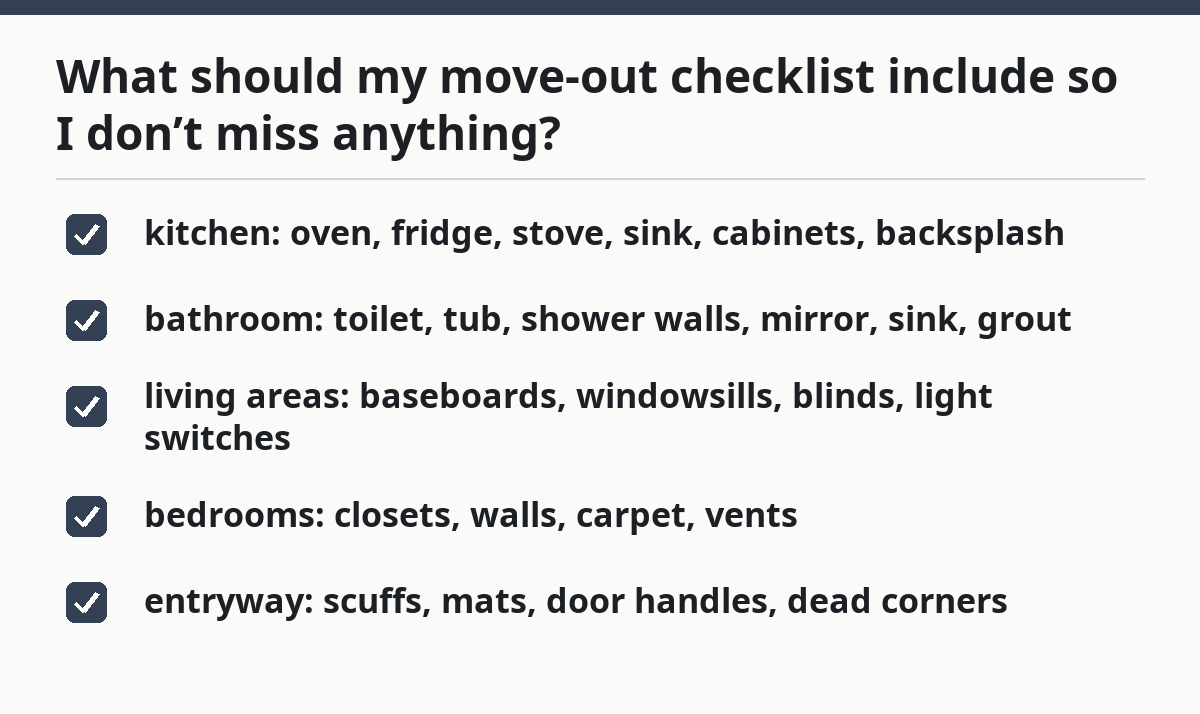
What should my move-out checklist include so I don’t miss anything?
Your move-out checklist should cover every room, every appliance, and every surface the landlord inspection is likely to touch. The point is to catch the boring stuff early, because the boring stuff is what becomes a deduction.
Picture this: you think the apartment is done, but then you spot dust on top of door frames, crumbs in a drawer, and a film inside the microwave. Those are checklist misses, not big disasters. Missed details are expensive because they often show up after you’ve already handed over the keys.
Start with the biggest spaces and work down to the small ones:
- kitchen: oven, fridge, stove, sink, cabinets, backsplash
- bathroom: toilet, tub, shower walls, mirror, sink, grout
- living areas: baseboards, windowsills, blinds, light switches
- bedrooms: closets, walls, carpet, vents
- entryway: scuffs, mats, door handles, dead corners
Then do the final pass with a light on in every room. Use daylight if you can. In a dark room, a clean surface can still hide dust, fingerprints, and pet hair.
A simple final walkthrough should take 15 to 30 minutes and focus on what a landlord will notice in one sweep. Check smell, visible dirt, damaged spots, and anything left behind. If the place still looks “lived in,” you are probably not done.
How do I reduce deposit deductions without overspending?
You reduce deposit deductions by fixing only what is visible, documented, and likely to matter at inspection. That means you spend on the things the landlord can point to, not the things that only bother you.
Picture this: you’re trying to decide between buying a new mop, paying for carpet cleaning, or leaving the stain and hoping for the best. This is the trade-off zone. Spend where the deduction is obvious and stop there.
Use these money-saving moves:
- clean first, then decide on repairs
- take date-stamped photos before and after
- keep receipts for supplies and services
- compare the cost of a fix against the likely deduction
- finish the kitchen and bathroom before worrying about cosmetic extras
A landlord may deduct for extra labor if the place is left dirty enough to need a deep clean. That is why appliance cleaning and bathroom detail work matter so much. They are cheap compared with a charge for a full service cleanup.
Don’t overbuy supplies for one-off use. A whole box of specialty products can cost more than the repair itself. A basic move-out checklist, one patching kit, and a focused cleaning plan usually beat a cart full of extras. If you are short on time, put the money into the tasks that protect the deposit fastest.
For broader move planning, this page sits inside the larger housing move costs for single parents guide, which is where the bigger budget picture belongs. Keep this page tight: it is only for cleaning and repairs after you leave.
What to do the week before the landlord inspection
The week before the landlord inspection, you should do the final clean, document the condition, and leave time for one correction. That last margin is what keeps a small miss from becoming a fee.
Picture this: the keys are almost ready, the house is empty, and your list has one last line for the hallway wall or the stove drip pans. This is the stage where panic cleaning does not help. One final pass beats five rushed ones.
A good 7-day finish looks like this:
- 7 days out: confirm what the lease expects for cleaning
- 5 days out: buy any supplies and finish patching
- 3 days out: deep-clean the kitchen and bathrooms
- 2 days out: vacuum, mop, and dust the whole unit
- 1 day out: do the final walkthrough and take photos
Keep the receipts in one folder or envelope. If the landlord questions the condition, you’ll want proof of what you cleaned and repaired. Photos help too, especially for a wall patch, a spot-cleaned carpet, or an appliance that was scrubbed down.
The job is not to make the place new. It is to make the condition clear, clean, and easy to verify. That saves time at handoff and lowers the odds of a dispute.
What move-out cleaning is usually expected?
Move-out cleaning is usually expected to leave the home free of trash, visible dirt, grease, and personal items. The exact standard depends on the lease, but a landlord inspection often focuses on kitchens, bathrooms, floors, walls, and appliances. A clean final walkthrough is easier when you already know which rooms need the most attention.
Which repairs are worth doing before i move out?
The repairs worth doing are the small, visible ones that are cheap to fix and easy to notice. Patch nail holes, clean stains, touch up grime, and repair simple damage that could lead to a deduction. Skip larger work that is really the landlord’s responsibility or needs a tradesperson.
How do I reduce deposit deductions?
You reduce deposit deductions by fixing the obvious issues, documenting the condition, and leaving the home as clean as the lease expects. Focus on kitchens, bathrooms, walls, and floors first, then do a final walkthrough with photos. A modest spend on cleaning and patching often saves more than it costs.
Where to get more help
For lease and tenant standards, the U.S. Department of Housing and Urban Development explains tenant rights and housing responsibilities at https://www.hud.gov/. For cleaning products and safe use on surfaces, the U.S. Environmental Protection Agency has guidance at https://www.epa.gov/.
Drafted with AI; not yet reviewed by a person.